


When it comes to getting your artwork ready for screen printing, there’s a couple of factors to take into account to ensure your T-shirts print at the highest quality.
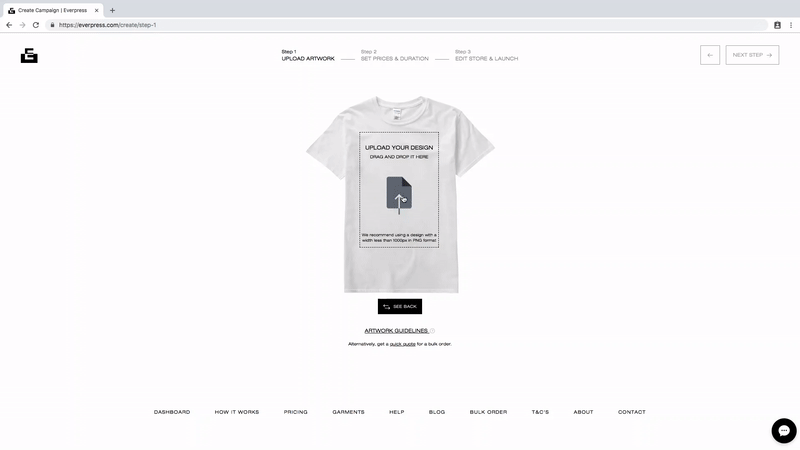
Using our campaign builder you are able to have a pre-order campaign live and gathering orders in minutes, but at this point, you’re only half-way there. When you’re creating your T-shirt in the campaign builder, you’ll only need a 10mb PNG file, but once you hit the right number of sales to ensure your T-shirt gets printed, we’ll contact you to ask you to send over high-resolution artwork to base the print off.
In order to make sure your artwork is optimised for printing, it’s vital that you deliver artwork that ticks all the key printing boxes (resolution, colour space, file-type) to our production team before the end of any successful campaign. For tips on how to get this part right, read on:
THE BASICS
- As a standard we offer two placements on front and back, with a maximum print area of 330mm width x 490mm height.
- We don’t print over edges or seams.
- When uploading your artwork to the campaign builder, use a transparent background. If you use white, black or colour, the campaign builder will assume it is part of your design, and everything from your profit margin to how your T-shirt comes out will be affected.
- Artwork that’s uploaded to the campaign builder should be high resolution (300dpi) and PNG files of max 10mb.
Artwork and the Campaign Builder
It’s helpful to think of the artwork you upload to the campaign builder as being used mainly to create the digital mockup that is visible on your final campaign page. Because massive files can take forever to upload, we cap the maximum possible uploaded file size to 10mb.
When your campaign is successful, you’ll receive an email from our production team asking for the full resolution file (remember, always 300dpi). Once you’ve sent this over, we’ll keep it at hand, ready for print as the campaign ends. This step is super important as it helps us ensure that you’re getting the best print quality possible. You can also email your high-resolution (300dpi) artwork to hello@everpress.com at any time once it has reached its minimum amount of orders.
NOTE: We will default to the original uploaded file for printing if no other artwork is supplied to us before the end of a successful campaign.
RESOLUTION
We ask for all print versions of artwork to be high-resolution, or 300dpi. As a quick explainer, dpi stands for ‘dots per inch’, which basically means the amount of detail in an image. Having a 300dpi image will ensure there’s enough detail to keep your print as accurate as possible. Because 300dpi files are large in size, you may not be able to upload them directly to our campaign builder, but if your campaign is successful we’ll prompt you to send the high quality version of your artwork to our team.
Tip: It’s best not to lift images directly from the web, as these images are usually low quality (typically only 72 dpi) to optimise page loading. Though they look fine on-screen, they will be very blurred and pixelated when printed on your T-shirt.
COLOUR
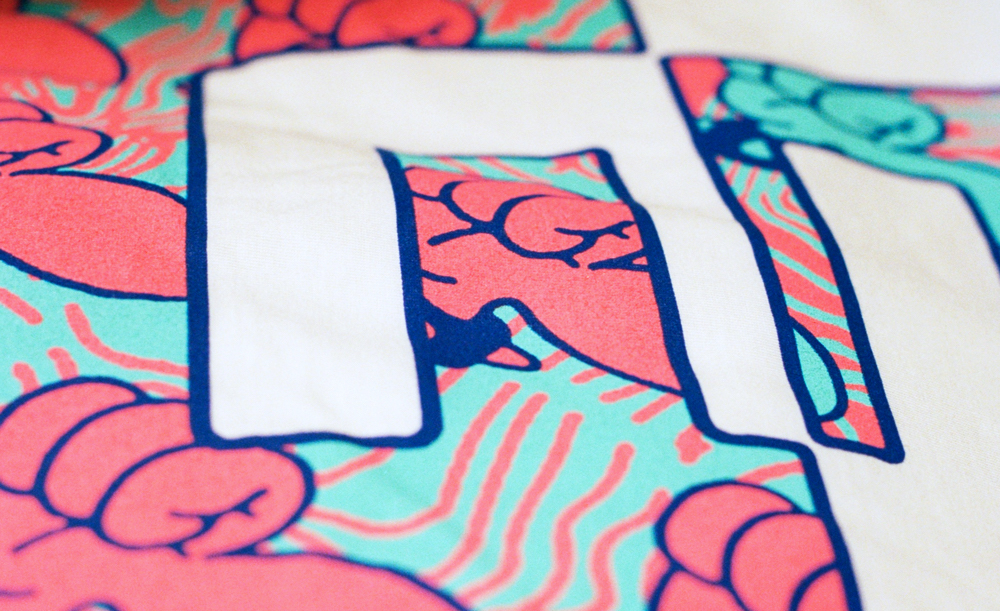
As with 300dpi resolution, ensuring your artwork’s colour is high quality will make for an optimum T-shirt print. We recommend exporting files to a RGB colour space, as this will give you the most accurate reflection of what your design will look like in the final print.
One of the key things to bear in mind when it comes to using colour is that printed colour may look slightly different to your on-screen design. Coloured inks have varying degrees of transparency which means that not all colours print equally, and there are a couple of problem colours to look out for when designing. Darker blues and fluorescents will tend to print less well unless they’re on a white T-shirt.
Tip: To keep your print as cost-effective as possible, and ensure the chances your T-shirt will be screen printed rather than DTG printed, we recommend keeping designs to a maximum of 1-2 colours, including black and white. For more info on screen printing v DTG, head here.
LINE DETAILS & FONTS
When it comes to choosing font and line size and thinking about detailing, it can be helpful to visualise your design as it will look when outlined in wet ink. Because ink is a fluid it will spread very, very slightly, so to avoid bleeding it’s best to keep intricate detailing to a minimum. (If unsure though, please check in with us!)
In terms of sizing, a good general guideline is:
- Fonts – 12 points or above
- Lines – 0.3pt stroke size
ILLUSTRATOR
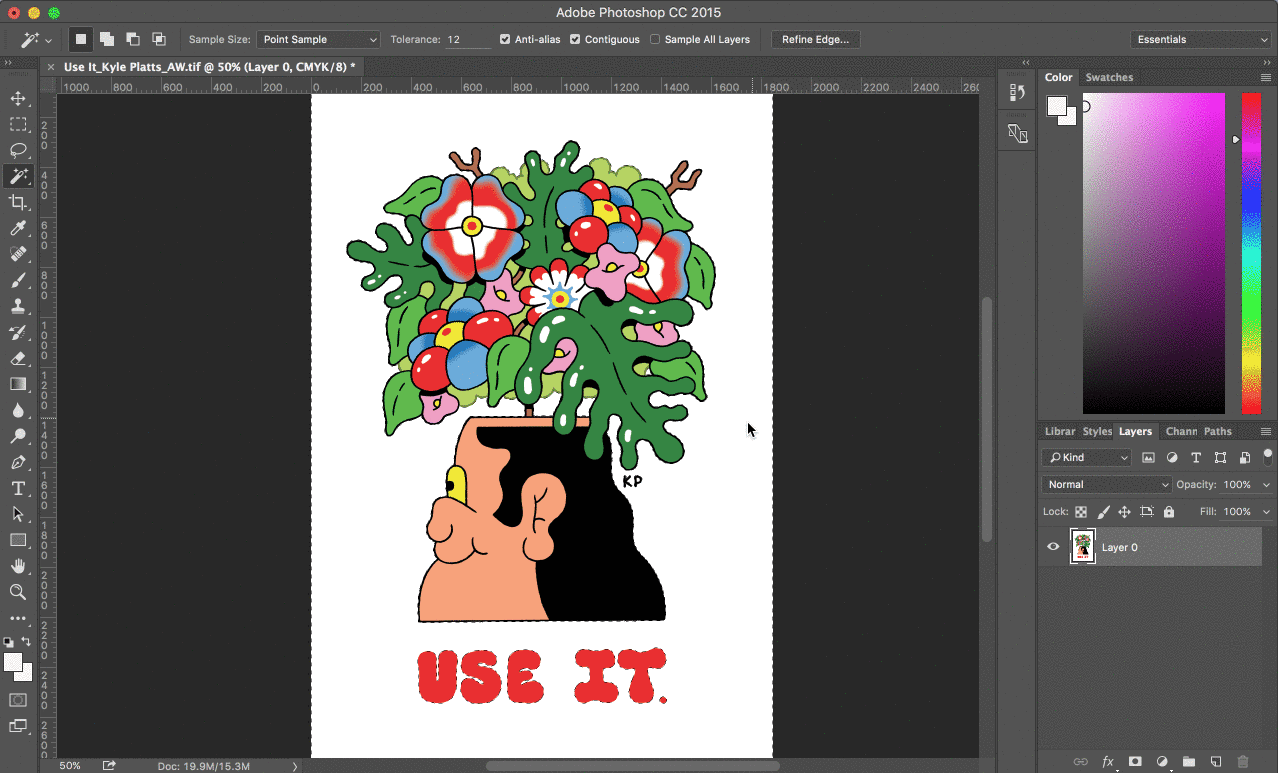
Illustrator is one of the best programmes to design artwork for printing in because it uses vector graphics, however there are a couple of things to watch out for when designing:
- Effects: Be mindful when using illustrator that some of its effect options will print differently to how they appear on-screen. Drop shadow and gradient effects tend to be best avoided as they’ll overcomplicate your file by mixing image types. It’s still possible to achieve these effects, but this is best done by making up a series of small dots – though it takes longer, the effect is much better when printed.
- Overlapping shapes: When you overlap two shapes in Illustrator you can give the top one a lower opacity to create a mixed colour where they meet; eg a lower opacity blue overlapping a yellow will create a green. With printing though, it’s rare that this effect will carry through because of unpredictable ink transparencies and intermingling pigments. To create this effect, instead use a spot green colour.
Tip: If you upload artwork to the campaign builder with a white, black or colour background, the campaign builder will assume it is part of your design, so be sure to use a transparent background.
Cost effective placements
It’s worth keeping in mind that the total amount of placements – the different locations where you choose to have artwork printed onto a garment – will also have an impact your minimal sales price, and ultimately your margin. This is due to the fact that additional placements require extra setup work and therefor extra costs. If you are looking for the best ways to increase the biggest profit margin on your campaign we recommend sticking to 1 – 2 placements, our campaign builder offers two placements; front and back with a maximum print area of 330mm width x 490mm height. (Get in touch if you want to discuss additional placements – these will be approved at the discretion of our production team.)
Our price calculator is a great way to visualise how adding additional placements and colours impacts your minimum sales price, margin and possible print method. Check it out here.