Our campaign builder is the easiest way to get yourself set up to sell T-shirts online. It only takes a few minutes to use, but we understand that guidance is always useful. With that in mind, here’s a few steps to follow in order to get your campaign properly up and running, complete with some tips to help maximise sales.
Step 1 – Upload your artwork
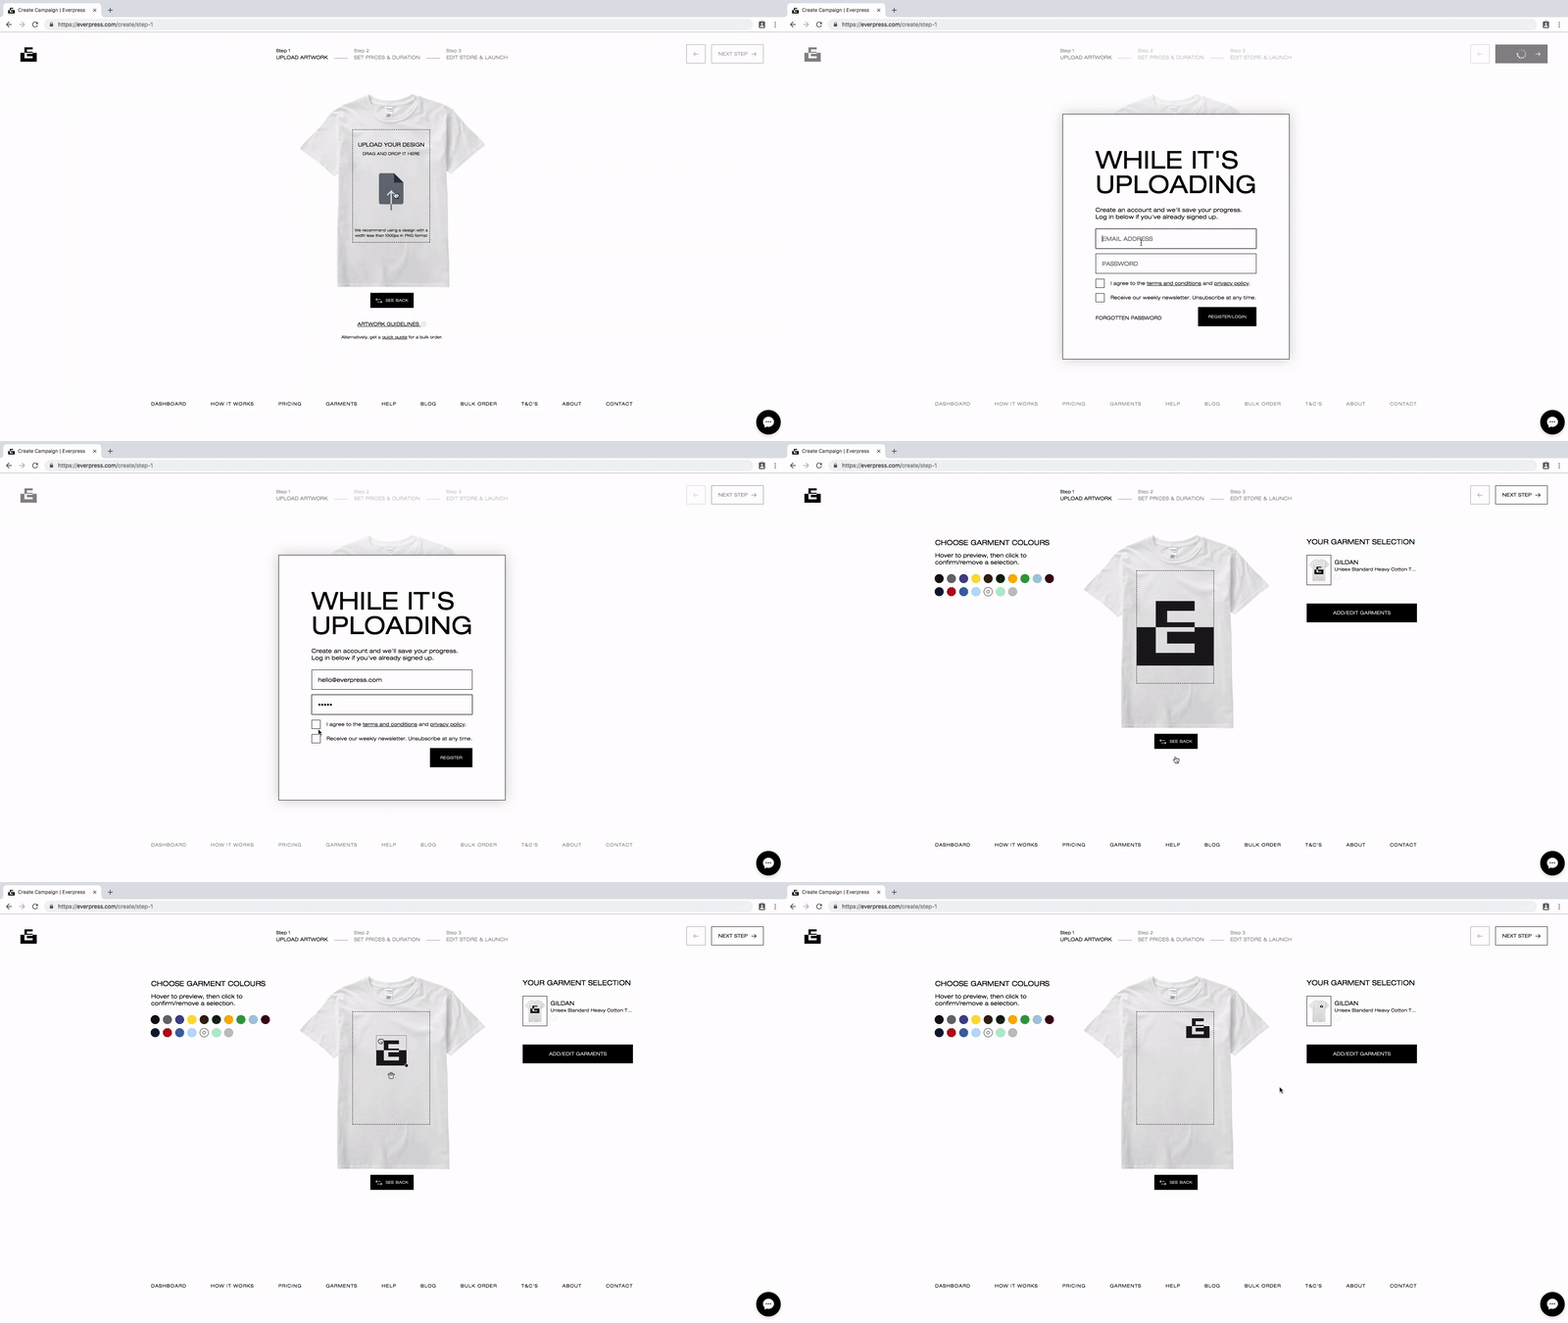
- Drag and drop or upload your PNG design file to the template. If possible, artwork should be 300dpi and smaller than 6MB in size.
- Once uploaded, our system will detect the amount of colours in your design. This is an important part of the process as the amount of colours in a design directly impacts the cost of production, and eventually your profits.
- Select the amount of colours in your artwork.
- Scale and move the artwork to the right proportions and position.
Tips:
- If you’re having trouble with artwork or colours, don’t stress. Our production team will contact you for 300dpi, high quality artwork if your campaign is successful.
- Get our full artwork guide here.
— The first step is to upload, scale and position your artwork
Step 2 – Add/Edit Garments
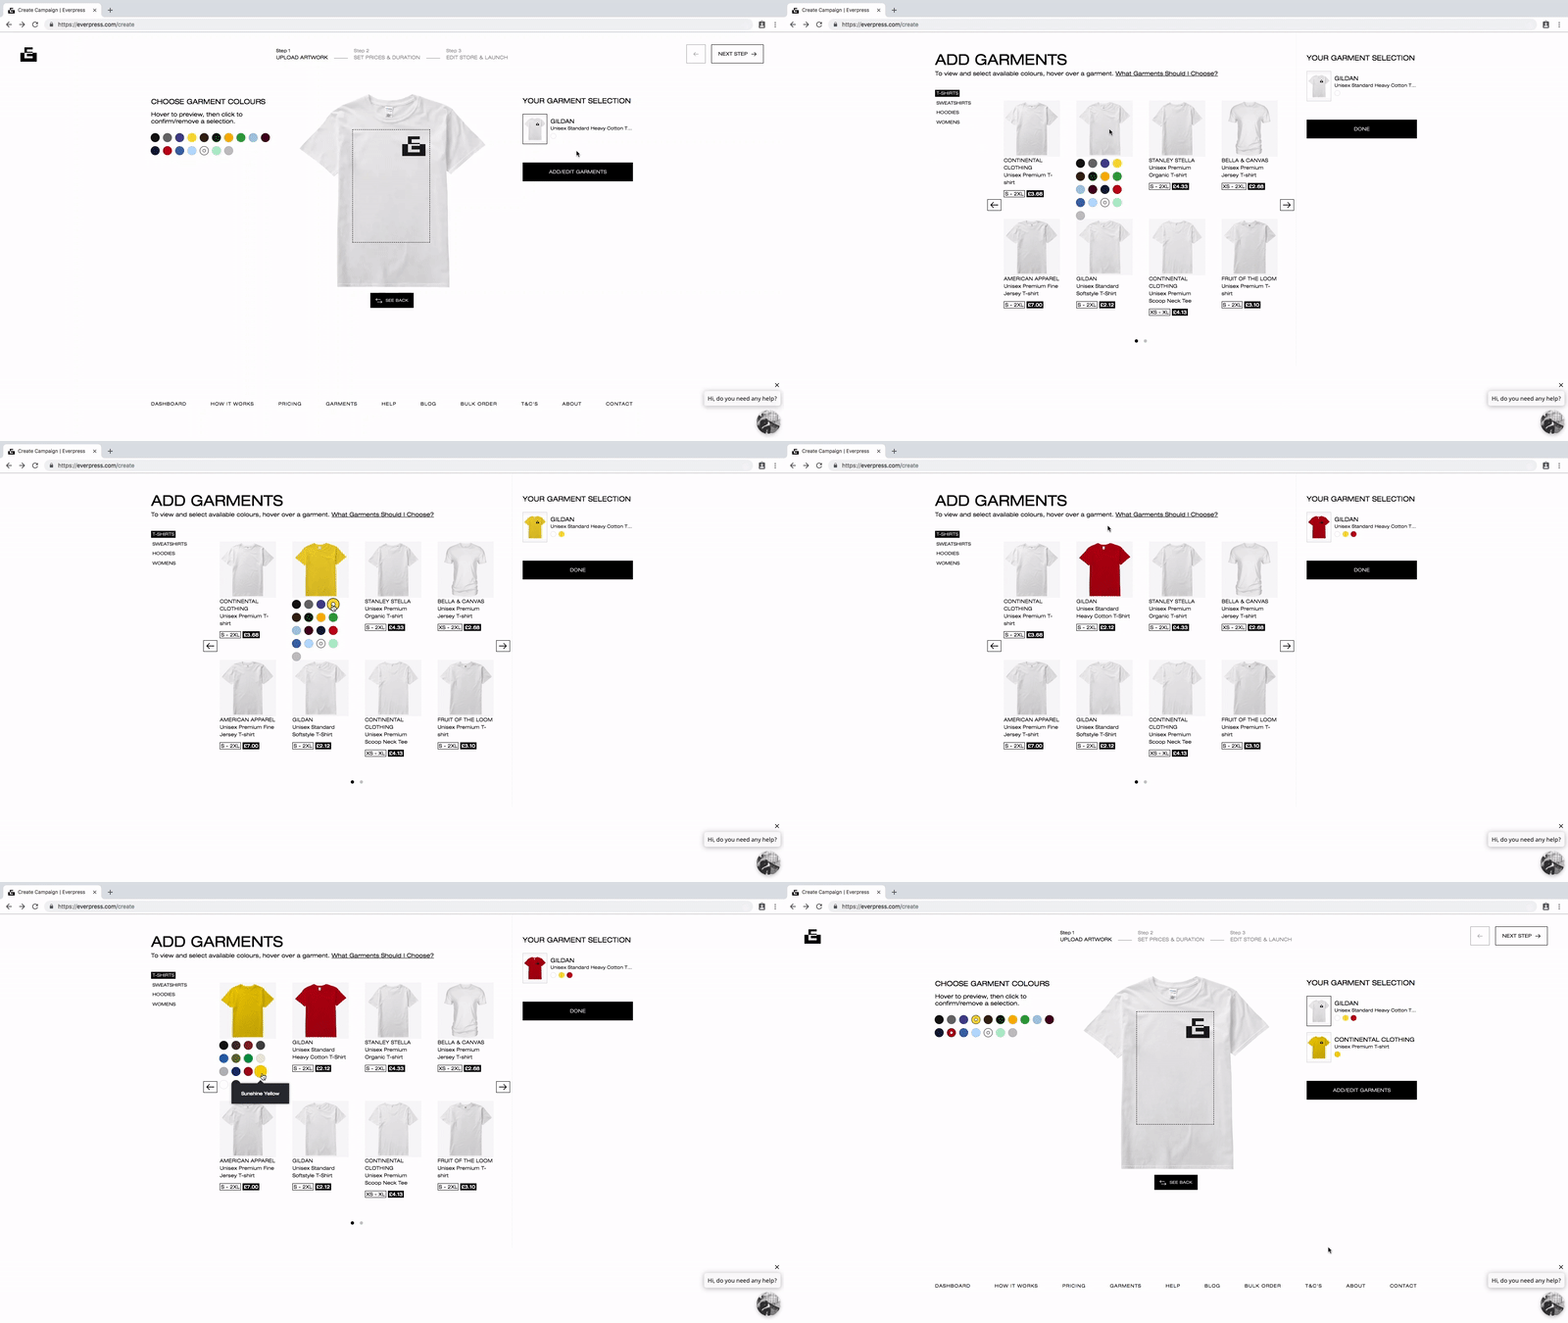
- Click ‘Add/Edit Garments’ to choose your garment.
- Use the tabs to browse the different garment categories.
- Make a selection by clicking on the relevant swatch colour.
- Click ‘Done’ to continue.
- Hit ‘Next’ in the top right corner if you’re ready to move forward.
— Select the garments you’d like to sell
Tip:
- Take a closer look at our garments range here.
Step 3 – Set Prices & Duration
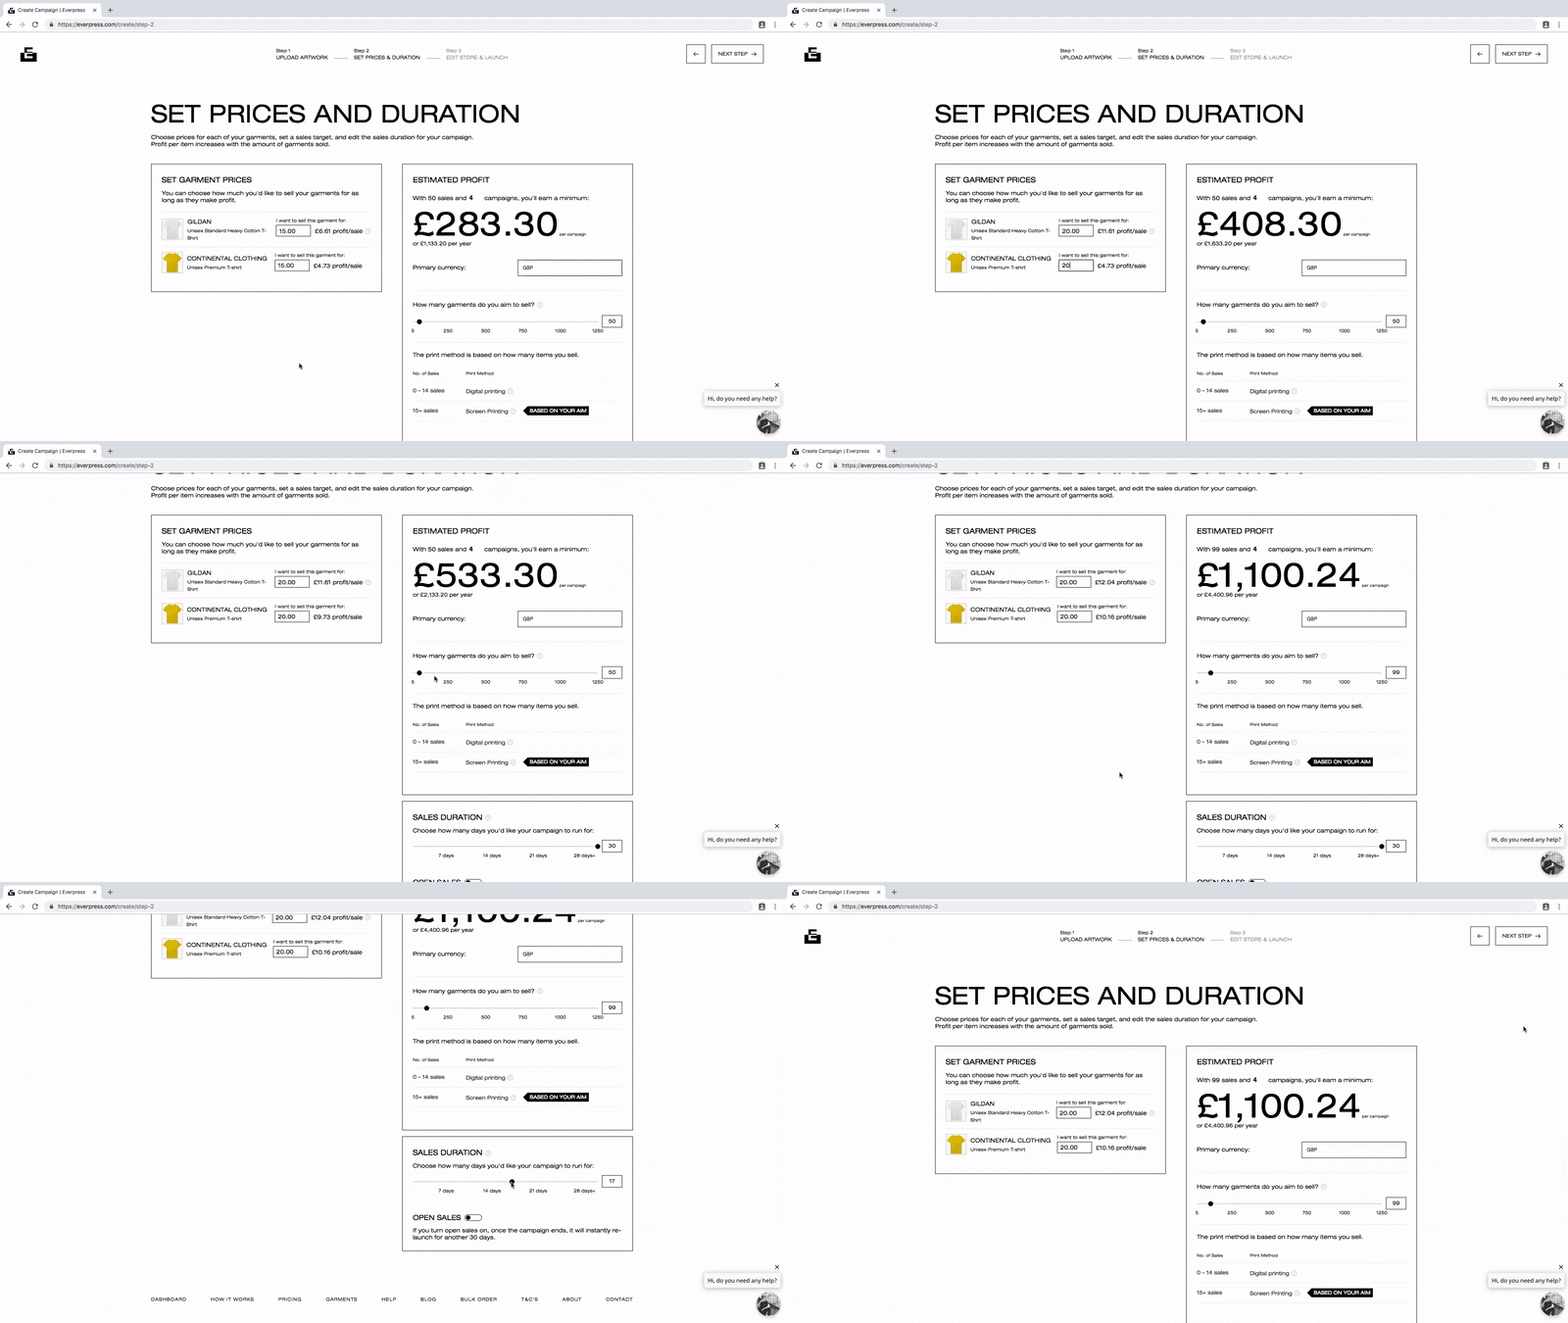
- Set the price you want to sell each item for. Once you’ve done this you will see an estimate of your profit margin based on this price.
- Select your currency of choice.
- Move the slider to select a sales target. This will help get a more accurate estimation of potential profits.
- See your estimated sales threshold for either screen printing or direct to garment printing. Read more about these printing methods here.
- Choose your campaign duration and then you’re set to go.
- Simply hit ‘Next’ at the top right of the screen.
— Use the sliders to adjust the sale price and view your estimated profits
Tip:
- Hit ‘open sales’ to make your campaign instantly re-launch once it has ended. This is a great option if you feel you didn’t maximise any last minute buzz.
Step 4 – Edit Store & Launch
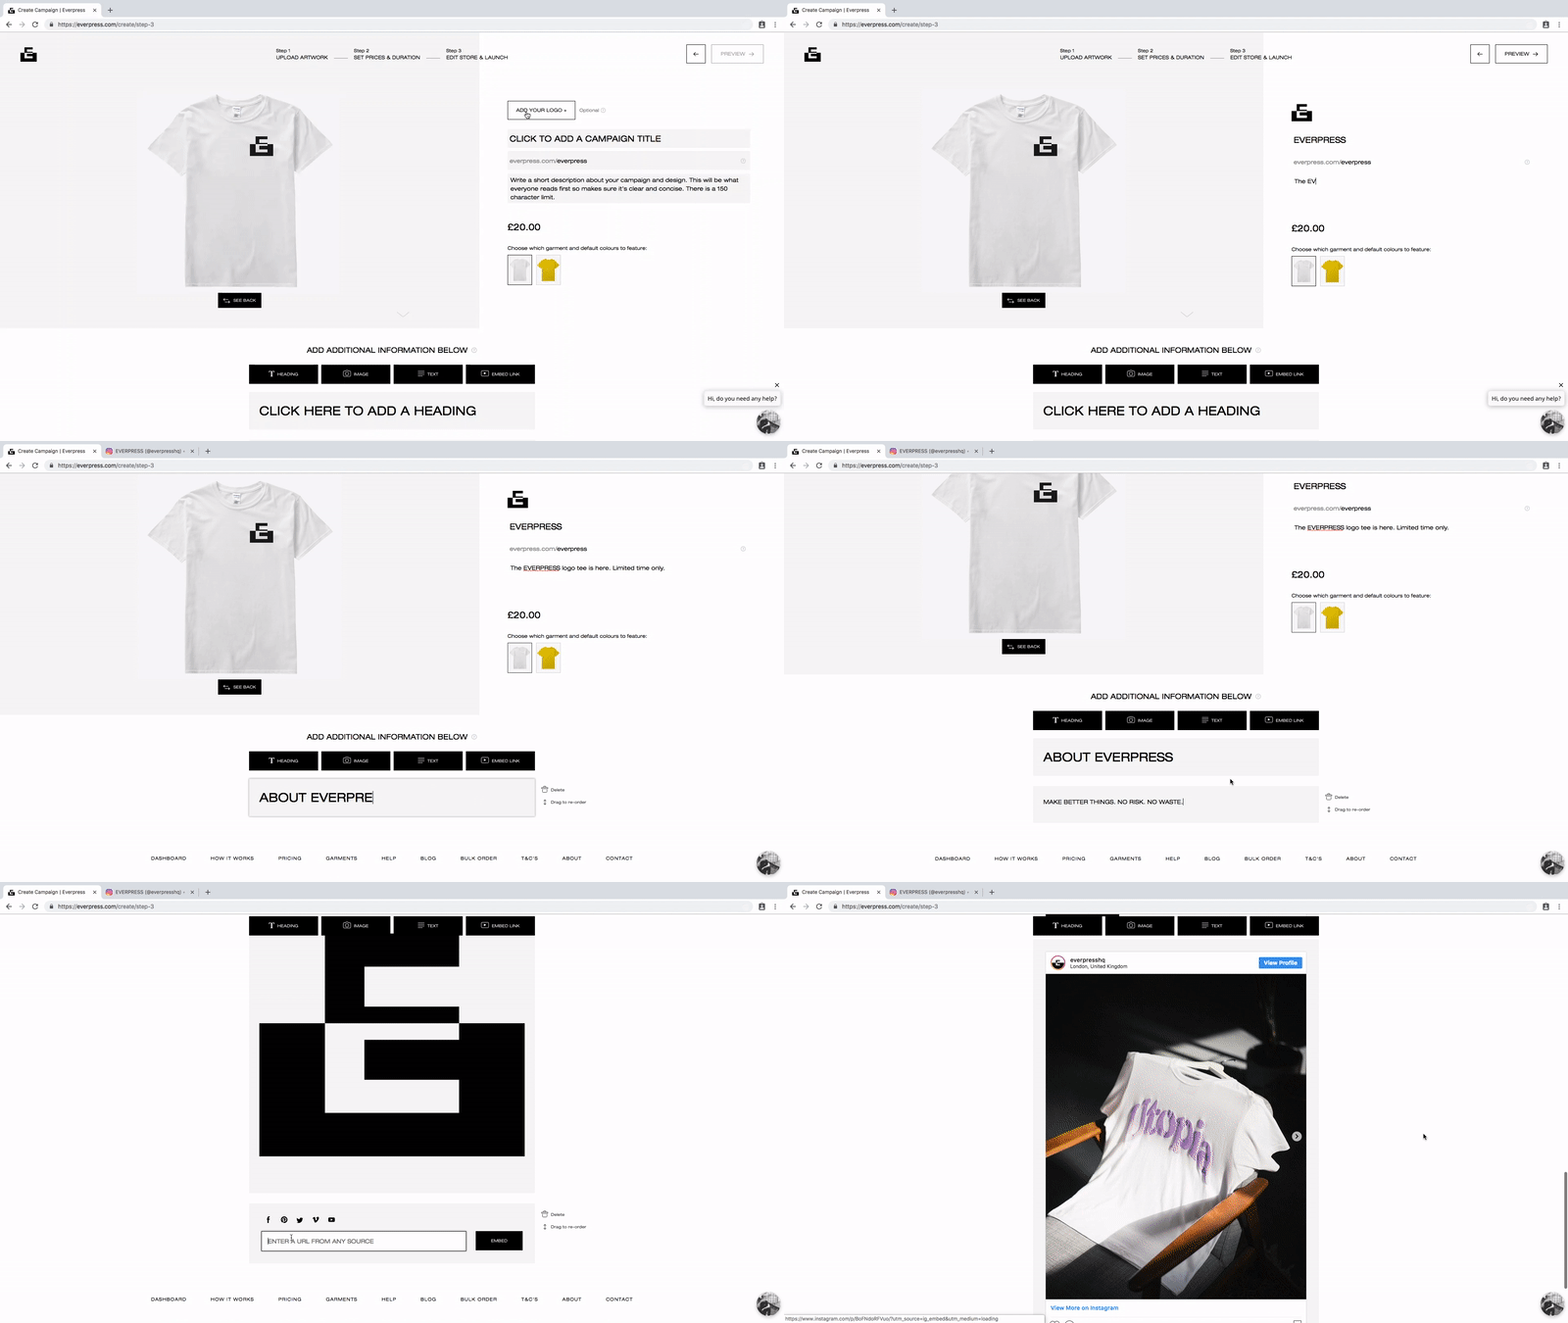
- Upload a logo in PNG format. We recommend this file is no larger than 400px x 400px.
- Enter a campaign title, this part is important as this is the main title people will see.
- Make sure your URL is clear, simple and that all words are separated by a hyphen ‘-’ (e.g everpress.com/adam-tickle).
- Write a short description for your campaign, up to 150 characters long. Be sure to use the space to tell your story!
- Choose which garment type and colour to feature, whatever you choose here will be what people see first when you share your campaign.
- Now add your ‘Additional Information,’ one of the most important parts of your campaign page. Using the space provided show your fans who you are and what you do. Here you can add:
- Heading
- Body text
- Additional images
- Social media embeds, like Instagram posts or YouTube videos
— Tell your campaign story by adding your logo, text, images and video
Tip:
- The more visual and descriptive you make your campaign page, the more likely your campaign will be to sell. For an example of a campaign with well written descriptions and a clear story, head here.
Step 5 – Preview
- Click the ‘Preview’ button and you’ll be taken to a preview of your ‘live’ campaign page: it’s time to take a look at the finished product.
- Check all the content appears correctly, this is your last chance to easily make changes!
— Check over your draft campaign
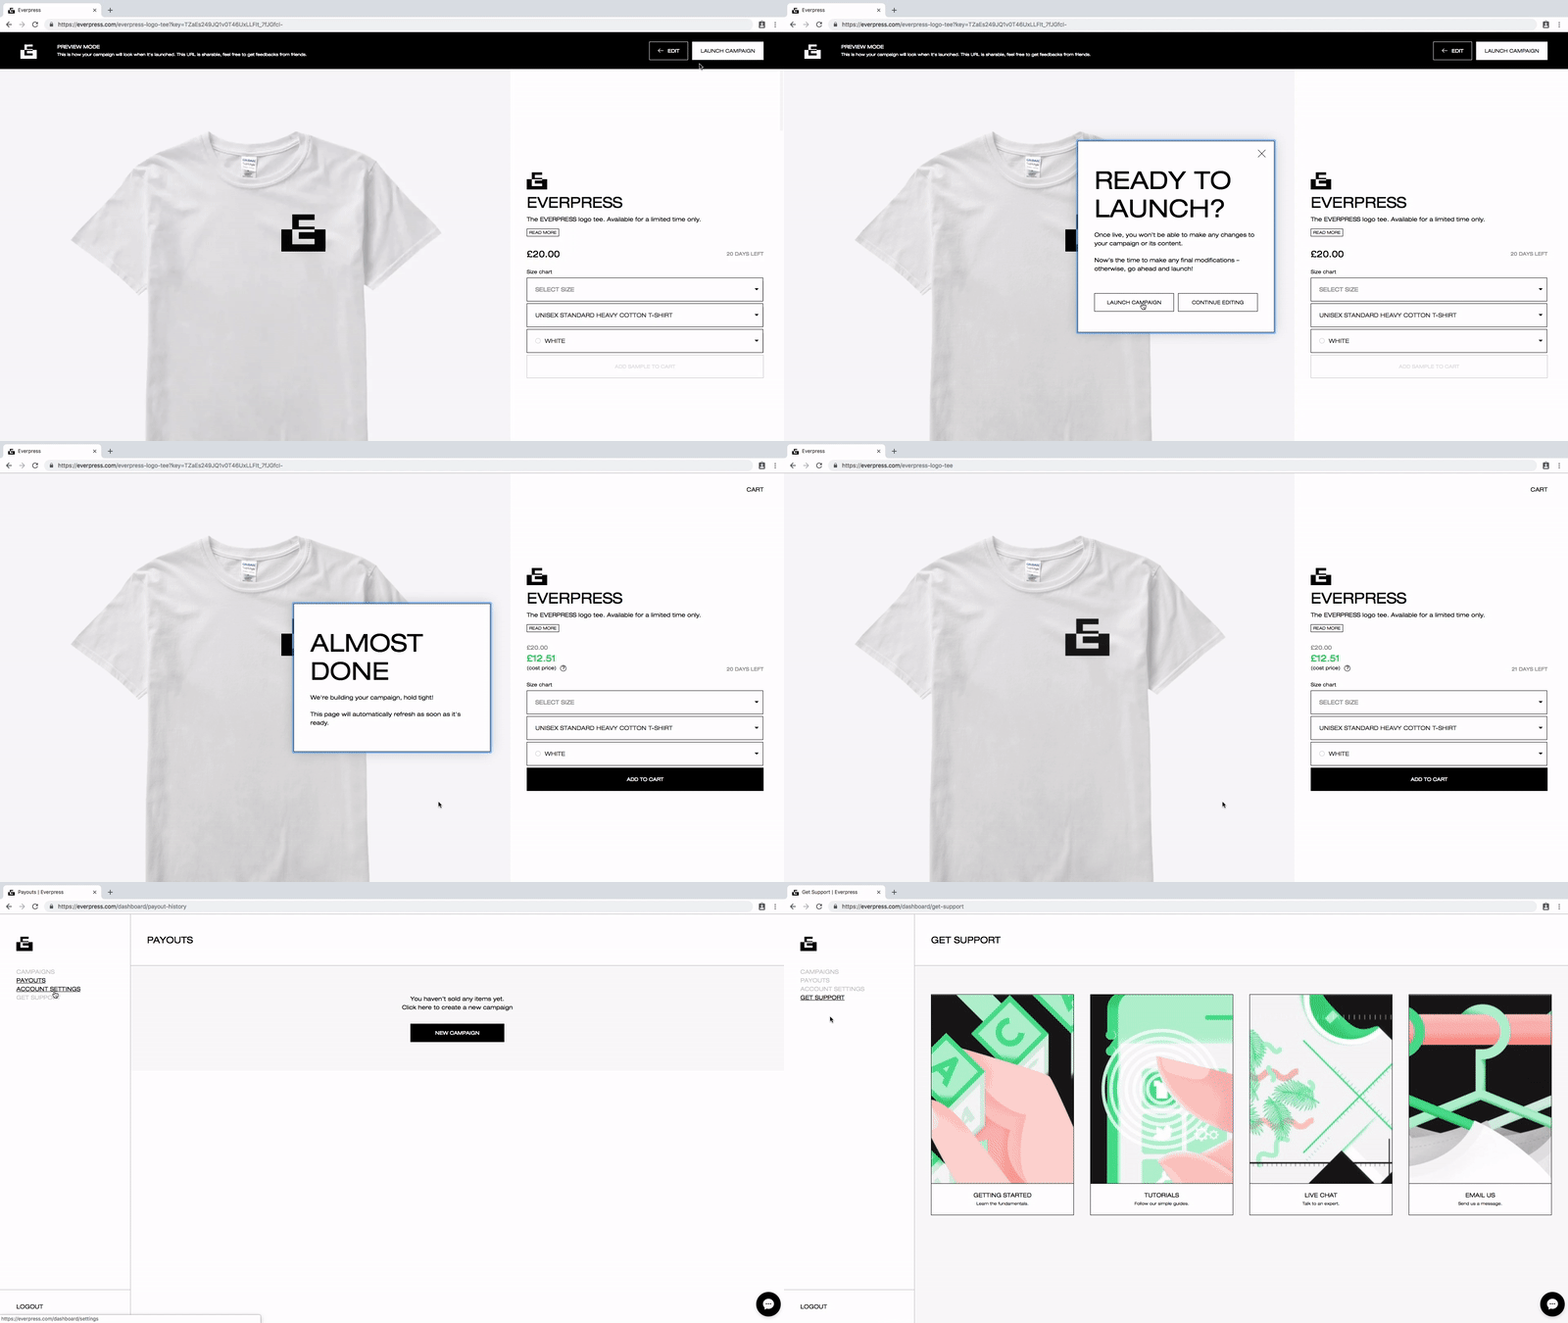
Step 6 – Launch
- Hit the ‘Launch Campaign’ button in the top right corner when you’re ready to launch.
- A pop-up will appear prompting to you to confirm you’re ready to go! This is to make sure you don’t accidentally launch your campaign.
- Now sit tight while the website builds your campaign, this can take a few minutes.
- Once the page is refreshed you have your live URL and campaign – this is where you should direct people at all stages to maximise sales.
Step 7 – Your dashboard
Now you can login to your dashboard, where you can view and track your live sales and profits. You can find our full guide to dashboard features here, but there are two key features which let you amend your campaign once live:
Duplicating Campaigns:
By simply clicking the ‘Duplicate Campaign’ button you can now seamlessly duplicate any of your campaigns, whether it’s currently live, has ended or is still at draft stage. Handy if you want an existing template to create a new campaign from, you’re relaunching a design but want to amend details on price or colour options, or you just want to keep a draft copy of your campaign page saved as you go.
Relaunching Ended Campaigns:
Once your campaign has ended, you can choose to relaunch it seamlessly at any time by clicking the ‘Relaunch Campaign’ button. We’ve put together a full rundown on getting the most out of your campaign relaunch here. In short: a last minute surge in sales or a flood of messages from people who missed their chance to buy can mean it’s worth your while immediately relaunching. In the longer term, our ‘re-launch request’ feature on your campaign page lets fans register their interest in a relaunch, once you get 10 of these we’ll automatically email you to notify you, and this can be a good time to relaunch.


